INTEGRATION
Jobvite + ClearChecks
Connect your Jobvite account and order background checks in one-click!
|
Summary
Our Jobvite integration allows you to order a background check directly within the Jobvite platform.
This integration is designed to incorporate the background check process seamlessly into your workflow. This article will explain and show you how to:
Enable the Jobvite integration with your ClearChecks account
Configure the Jobvite Workflow and Requisition Template
Order a background check
Click to view a candidate's background check
Requirements to Get Started
You must have a ClearChecks account and Jobvite account.
If you are not a ClearChecks customer, click the button below to create an account, or you may also contact our sales team sales@clearchecks.com to discuss custom packages or volume pricing.
Connect Jobvite to ClearChecks
Step 1: Submit a Jobvite support ticket
Contact Jobvite support and submit a request to set up the integration on their end. You should receive a API key and secret.
Step 2: Enter Jobvite Credentials in ClearChecks
Login to ClearChecks account
Click the Integrations & API link on the sidebar
Find the Jobvite integration and click Connect
A popup will appear. Paste your API key and secret copied from Jobvite.
Step 3: Send Webhook & Secret to Jobvite
Once you paste your API key and secret in Step 2, you will be provided a webhook link and a secret
Send this webhook link and secret to your Jobvite account manager to configure for your account.
Note: this must be setup by Jobvite, and you can not enter this in your Jobvite account
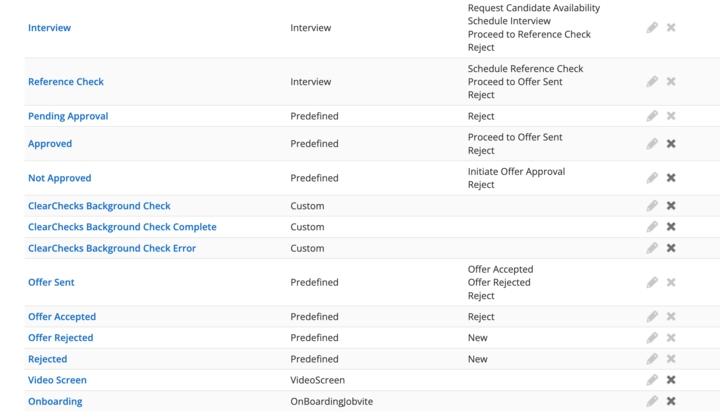
Step 4: Configure Jobvite Workflow
Edit workflow states under Admin -> ATS -> Workflows.
Add 3 workflow states that the background report order will trigger on
ClearChecks Background Check
ClearChecks Background Check Error
ClearChecks Background Check Completed
Note: You can click and drag workflow states around in the list
Note: These states will only appear for an applicant if the requisition uses the workflow you added these states to. If you added these to the default workflow, you do not need to worry about this.
Step 5: Update the Jobvite Requisition Template
Edit requisition templates under Admin -> ATS -> Requisition Templates
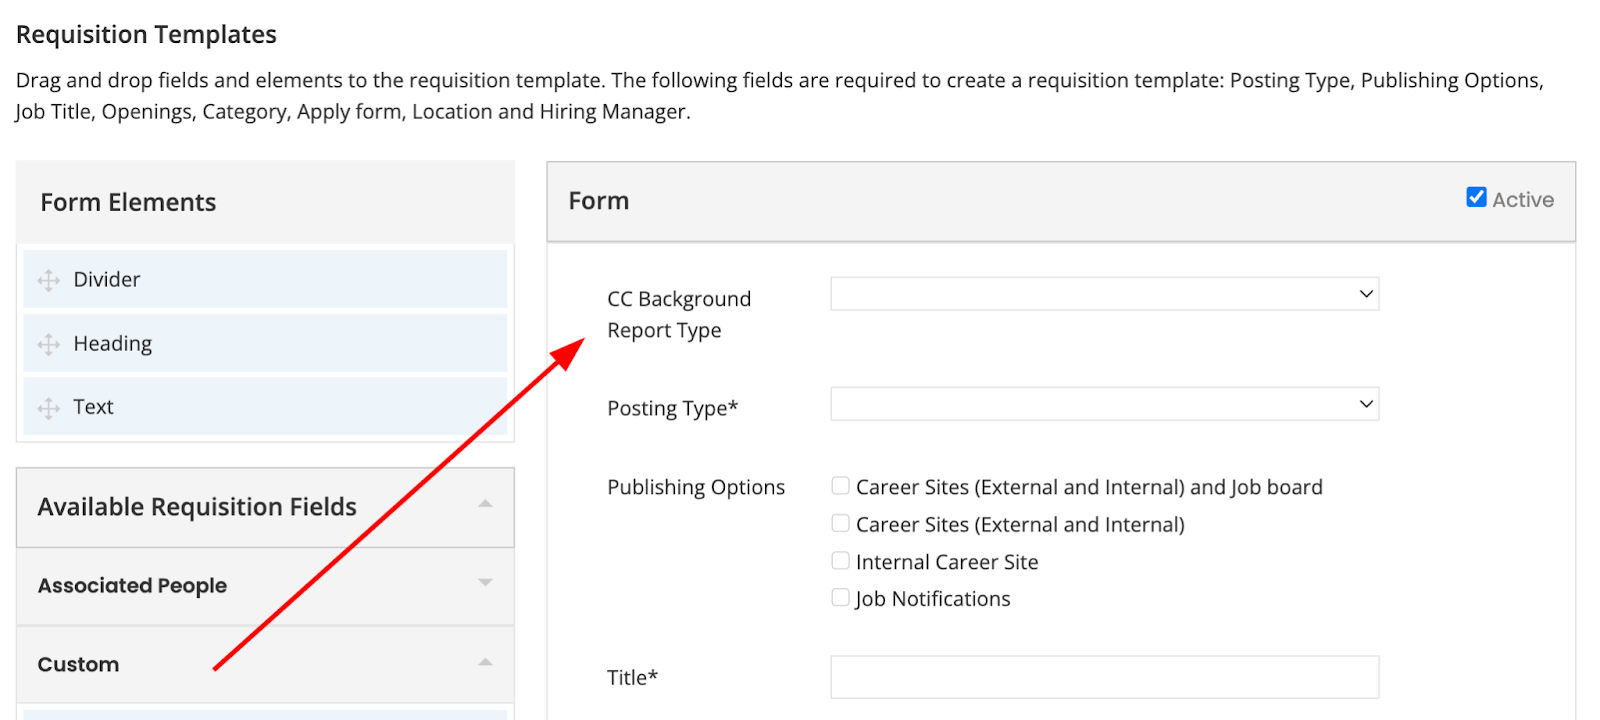
Add the custom ClearChecks Background Report Type dropdown to the requisition template by clicking and dragging the field into the requisition template on the right.
Note: If you don’t see this custom field, check the Admin custom field settings and ensure the custom field is active. You can drag any inactive custom field from the Custom dropdown on the left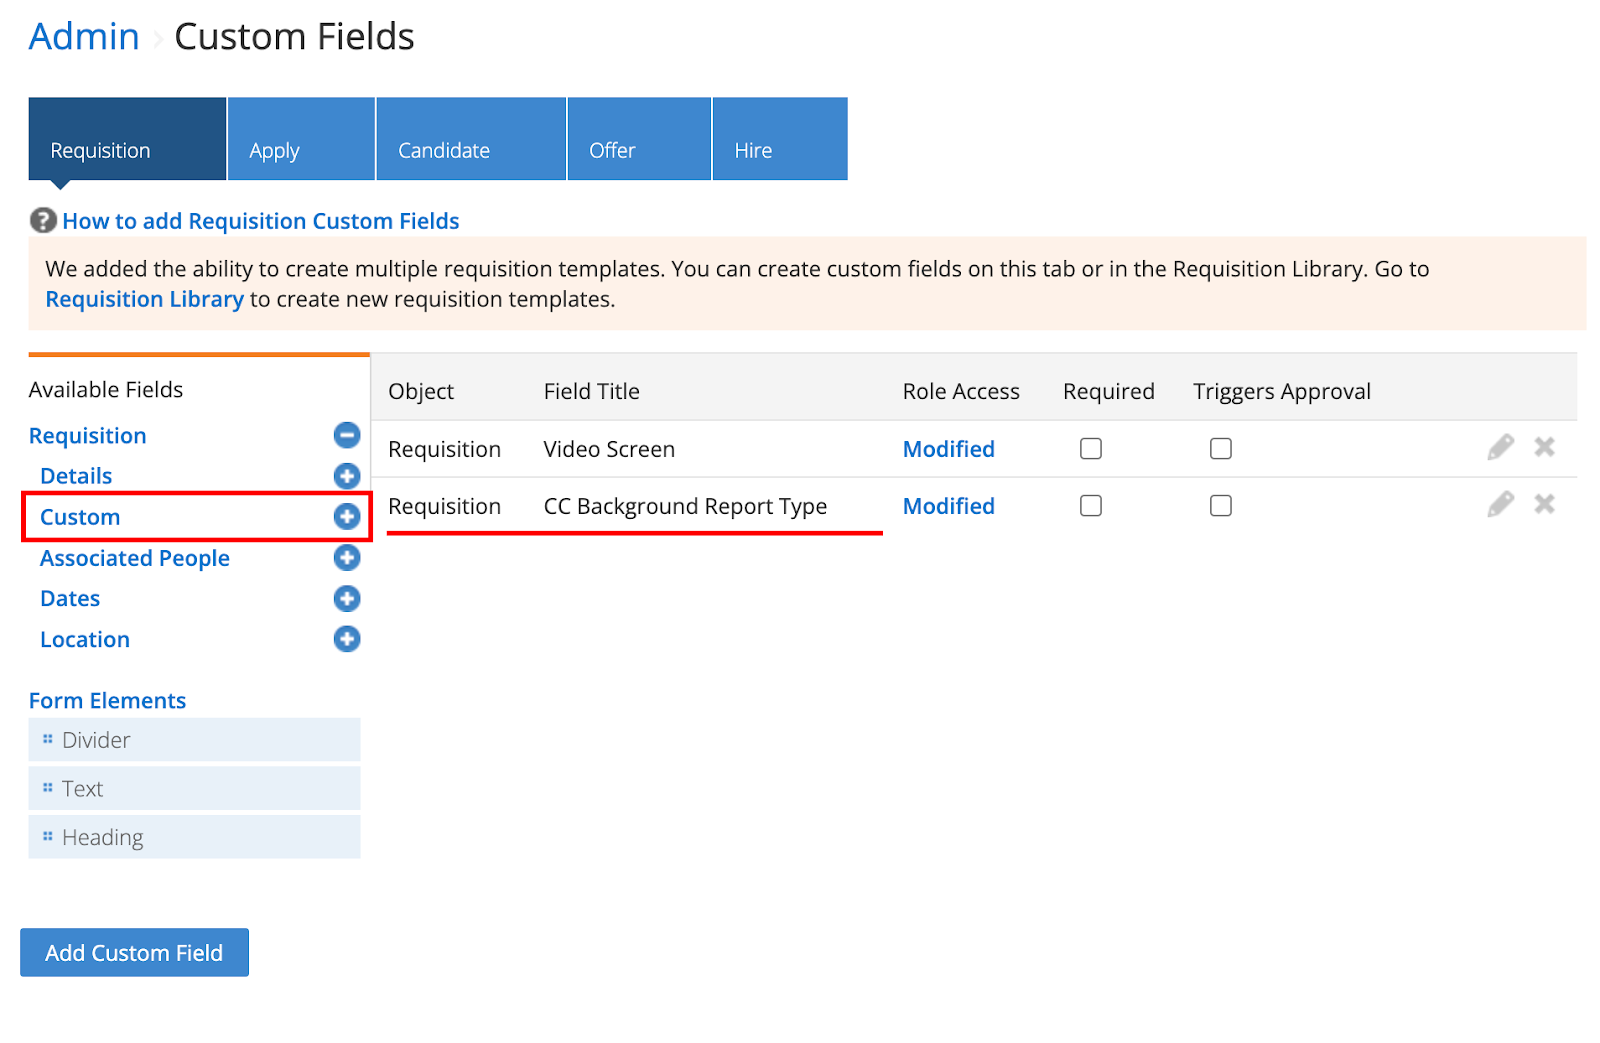
If you added the workflow steps to the non-default workflow, you can also drag in the Workflow field.
Step 6: Place a Background Check Order
To order a background report for a candidate, move the application to the ClearChecks Background Check workflow state.
Note: If a background report already exists for this candidate, another one will not be ordered.
Done! 🎉
Company
Background Checks